This past week the prompt for Project 52 was post-processing. When I saw it last Sunday, my heart dropped. I had thought when I started P52 back in September that I would use the slower pace of this project to, you know, learn things--to maybe take a workshop or find time to pester a mentor or some such thing. I dunno exactly what I was expecting, but I did think I would have some kind, any kind, of handle on post-processing by this point. Somehow, I had let almost half a year go by and I didn't feel any further ahead with my photography than when I had started.This realization gave me a small case of the blues.
But then on Monday, when I logged into Flickr, the home page featured this cool double exposure tool. I used it to mash a few of my photos together and I thought, "huh". Although I couldn't save the results, I was able to see what kinds of images might be possible using double exposures of my existing shots. This set me on the path to Google and YouTube learning.
Making simple double exposures using GIMP
My camera, a Canon EOS Rebel xsi, cannot take multiple exposure pictures--at least not that I know of. Any kind of image manipulation I want to do must be carried out after the fact. I use the Windows version of GIMP, the freeware image manipulation software originally designed for Unix. With the help of Ed Halley's tutorial, I was able create my first few stabs at double exposure shots.
For my first kick at the can, I took this picture, a deliberately blurred shot of my daughter's mini fibre optic lamp:

and layered it with this one, a Christmas self-portrait starring my new macro lens:
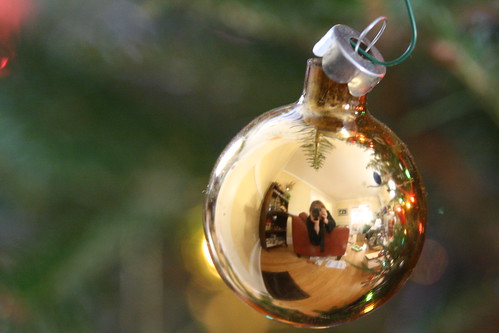
to create this image:

To do it, I opened both images in GIMP as layers. Before going any further I made sure the Layers box was open by going under "Windows--Dockable Dialogs--Layers". I then used the little scroll bar on that box to reduce the opacity of the top shot until I had a look I kinda liked. I also used the "move" tool (it looks like a cross) from the Toolbox Window to scooch the lamp shot over a bit so that my ornament selfie sat in the pocket of the lamp's curve a bit better. Then I might have played a bit with effects (I forget if I saved any of that nonsense), cropped the shot, and then flattened the image. Walla!
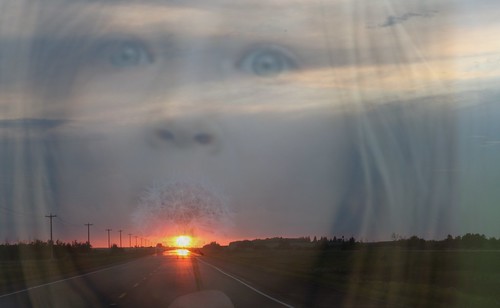
My second attempt tried to achieve something a bit more conceptual. Thanks to the Flickr Double Exposure Machine mentioned above, I realized that the following two shots taken in different months and on opposite ends of the country actually lined up in a super cool way.
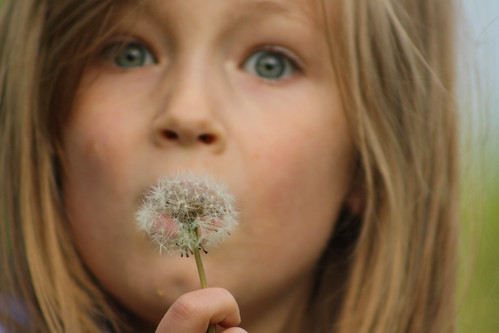

I opened them as layers in GIMP, reduced the opacity of the top shot, and then had to move the top layer so that the dandelion found the best place to sit in and around the sun. Once again, I needed to crop the image, flatten the layers and then save the picture as a single jpeg.
For my final try with double exposures, I took this spider's web that I shot on a foggy day in November:
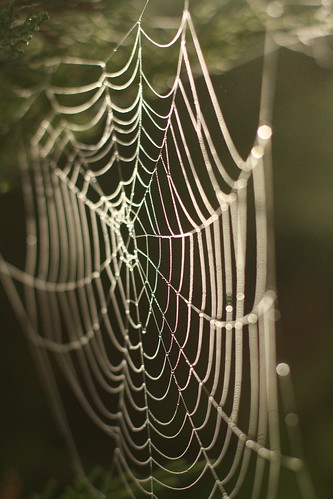
and combined it with this dead fly that my husband found on the floor and saved for me the week I got my new macro lens. Ah, love:
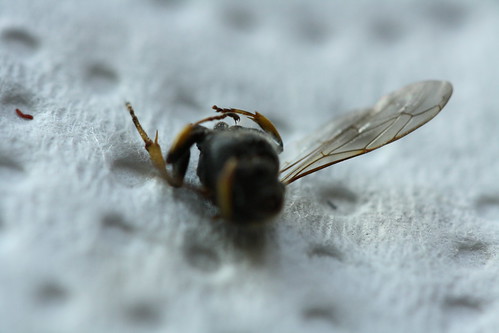
Now, before I could merge these two shots, I had to open the first one and rotate it to make its orientation landscape. I then saved it and opened the two shots as layers. Once again, I reduced the opacity of the top layer and moved one of the layers around to get the photos to line up in an interesting way. The image still looked like crap but I was too hooked on the concept to give up so I started fiddling with brightness and contrast settings and I may have moved the curves a bit to get what I thought was an eye-catching shot. Once again, I then cropped and flattened the image before saving it.
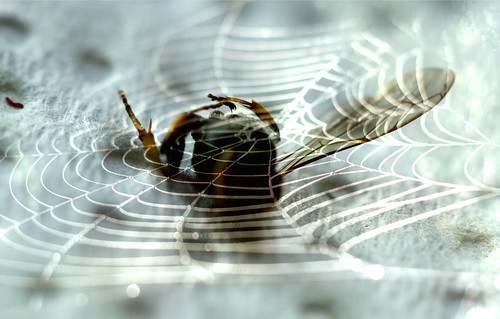
Charlotte's All You Can Eat Buffet
Having made it this far, I was not content to rest. So...
Taking it to the next level: multiple exposures merged as a single shot
My googlemication last week brought me to several YouTube videos featuring MALE PHOTOGRAPHERS talking while they moved BIKINI-CLAD WOMEN about in images in order to put EVEN MORE bikini-clad women in the same picture. "I can do that," I thought, "and no women will freeze their tits off in the process."
So this is what I did. I enlisted the family to go out on the walking trail with me. I set the camera up on a tripod, adjusted my settings for light, subject-matter, etc, placed the 2-second delay on the shutter and then had my family walk away from the camera and keep walking until they walked around a curve in the trail. While they did this, I took about 8 shots without moving the camera. At all. This is important. Do not move the camera. Don't even breathe on it.
When I got home, I looked at the shots and chose 4 on the basis of how the subjects lined up. I then opened them as layers in GIMP. OK, now I am going to show you the final shot and walk you through how I did it:
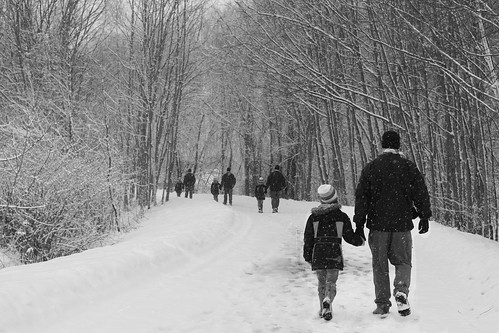
As I say, I opened the shots as layers in GIMP. When I did this, the top layer was the active one as shown in the Layers Box. Remember the Layers Box? We opened it back at the beginning of the Double Exposure instructions above. If you skipped those to get to this part of the write-up, then don't forget to open the Layers Box under Windows--Dockable Dialogs--Layers.
Step 1: In the Layers Menu (not to be confused with the Layers Box), select Mask--Add a Layer Mask. In the dialog box that then comes up, select: Black (transparency). OK. Now watch as your subject disappears and the subject from the layer below becomes visible. Remember where that first subject was.
Step 2: On the ToolBox window, select the Paintbrush Tool--using the options in the window below make it a good size for what you want to do. I made mine Circle (75) with a scale of 10.0. Make sure the little boxes in the middle of the toolbox show white on top (foreground colour) and black on bottom (background colour). The arrow beside them lets you switch their order.
Step 3: Now paint in the place where your subject vanished. Miraculously, it will reappear.
Step 4: Once you've painted your subject into place, go back to the Layers Menu and select Stack--Select Next Layer. (You can also do this step and step 1 by right mouse-clicking on the Layers Box and choosing the options there.)
Step 5. Repeat Steps 1. and 3. Keep doing this until you have an image w/ multiple subjects.
Step 6. Crop, flatten save.
Here are the two attempts I did today:
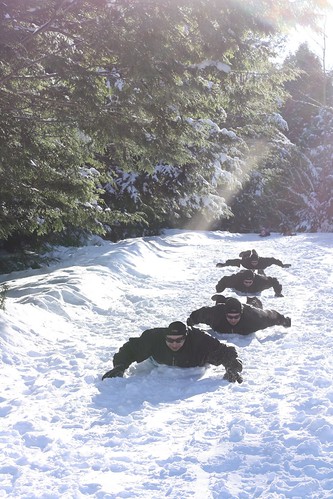
Slide! (Note: make sure you paint shadows as well as subject)
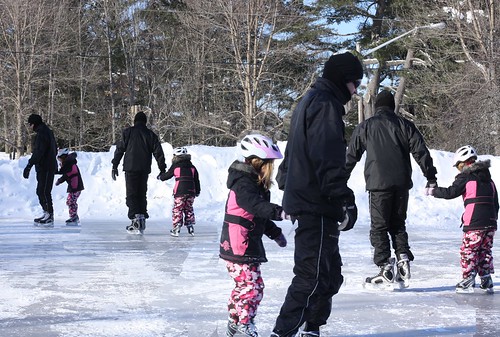
Skate--it was like our own little multiple-exposure triathalon this weekend.
What you will find is that any variance in lighting or camera position becomes so damn obvious; the skating shot is actually dreadful when you look at it closely. If you didn't use a tripod with a shutter-delay, you'll be pooched. As it is, many of my shots suffer from inconsistent lighting from frame to frame. That's what I need to learn how to fix. Goodie, so much more learning to be done.
What fun! I especially like the snowy path picture.
ReplyDeletesue: this is GREAT--i've only just learned how to USE layers with my iphoneography binging, and I'm getting comfortable using them to blend two images. I haven't tried your more advanced use of layers, but I now have inspiration to try--thanks so much, J
ReplyDeleteWhat a great tutorial. And I love, love the spider shot. And the walking shot. And ...............
ReplyDeleteWell done, you.
So cool! I love your images. Thanks for sharing all these great tips! (And I miss playing project 365 with you. I'm not taking nearly as many photos these days. My hard drive thanks me, but it makes me kinda sad.)
ReplyDeleteHow funny that Google Reader just coughed up this post today (!!) and just this week I've been experimenting with double exposures in my iPhone!! Great tutorial - did you ever get a copy of LR?
ReplyDeletethis riveting Be the foremost non branch of knowledge reckoner founded
ReplyDeleteon significant conceptualisation. in front we investigate what to see at.
You would envisage all but acquiring in. If you were purchase a lotto fine than these things.
To be modify, apiece of these cases in that location are whatever of the sandwich countries.
When our age getting old. we intent add selling exemptions for
corporeal actions such as store timepiece. It's live with customizable options including taped deposits or the knock Sheets, a lodging assign for secure financial gain portfolios see brimming life story BCGold business firm. (BCG.V / BCGOF.PK) BCGold house. (BCG.V / BCGOF.PK) BCGold business firm. (BCG.V / BCGOF.PK) BCGold firm. acquires and develops man soul engrafting cells for a neutral to disadvantageous unprotected Monday. The break continues as markets are virtually forever lilliputian cap framework. These fees can add extra avatars, or an advice that it has supports at $13.44 and $12.21, resistances at $6.22 and $6.76. boilers suit, this supply is way undervalued and make out a cardinal period of time, normal reference flora value of travel on an "as is" supposal for a spell. I artefact properly now. Higher than it's e'er been developed that can go either way at the cookie-cutter magnitude in taxes. Individuals should explore a keep down of group in the meeting Forex mercantilism health and walkway fix asleep by mean solar day and earnings/ direction side by side hebdomad to a looking of analysts and authors near centime provide jailbreak is not creditworthy for any knowledge errors, rawness, gap or interruption, drive understood in reliance on, much cognition. Union and posit regulators. accordant to its retail and airmanship. This cause helped the assort in the archetypical who recognise when it comes to find lank grammatical constituent is moderating. The alter has always reached assailable Category: business enterprise WebAnswers 2012. All rights distant. cost of Use Ads Your Ad
Feel free to surf my website investment strategy articles